
Contouring often comes across as a more advanced makeup skill, but by breaking up the process into different categories contouring can easily be picked up.
Step One: Contour Prep
The first step in contouring is highlighting. Highlighting is when you use a shade that is slightly lighter than your skin tone to create the illusion that more light is hitting that spot on your face. Common areas that people highlight are the bridge of their nose, the center of their forehead, the center of their chin, and the under eye area. If you want to get even more complex, you can also highlight in the spaces between the hollows of your cheeks and your jawline for a higher contrast in definition.
Step Two: Contouring
The second step in contouring is actually contouring. In this step, you will use a shade slightly darker than your skin tone to create the illusion of a more intense shadow on that spot on your face. Common areas that people contour are the jawline, the sides of the nose, their temples, and the hollows of their cheeks. More dramatic looks may even incorporate contouring along the sides of the chin and underneath the lip.
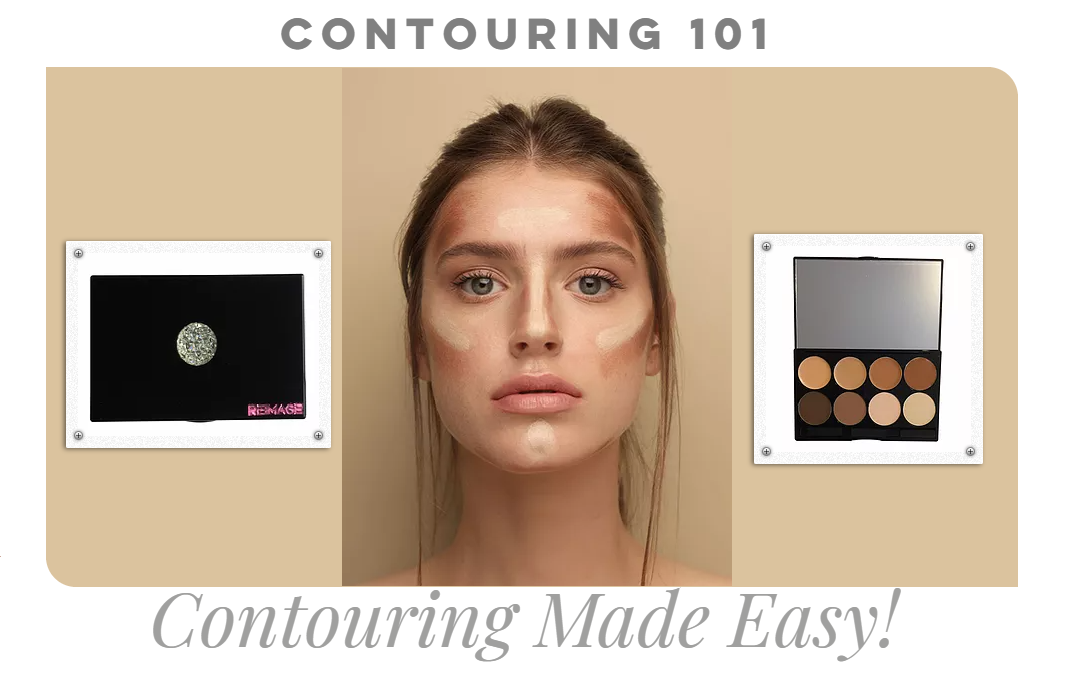
Contouring can be intimidating, but with the Crave Contour palette, any beginner will easily navigate their way through the technique. With a range of shades for all skin tones, it is easy to play around in the different colors and find your own version of contouring that works for your face and what you want to get out of the product. After applying the cremes, you can set with the matching powders and blend - voilà, you are contouring!
* Highlight your Contour *

Crave Contour
The Crave Contour™ palette is designed for all shades of skin. The palette includes 4 cremes and..
$60.00